So, you want to learn how to make vegan weed butter with cheesecloth? It’s not as complicated as it might sound. Whether you’re avoiding dairy or just looking for a plant-based option, making your own cannabutter is a pretty straightforward process. We’ll walk through the steps, from getting your cannabis ready to straining it out. It’s a great way to get into making your own edibles at home.
Key Takeaways
- Decarboxylation, or toasting your cannabis, is a necessary step to activate the THC for edibles.
- Coconut oil is a popular and effective vegan fat base for making weed butter.
- The infusion process can be done using a slow cooker, stovetop, or oven, with low and slow heat being the goal.
- Cheesecloth is a common tool for straining the plant material from the infused butter, helping to maximize yield.
- Proper storage in the refrigerator or freezer will extend the shelf life of your homemade vegan weed butter.
Preparing Your Cannabis For Infusion
Before you even think about mixing up a batch of vegan weed butter, the most important first step is getting your cannabis ready. This isn’t just about breaking it up; it’s about activating the good stuff inside so your edibles actually work. Think of it like prepping ingredients for a fancy meal – you wouldn’t just throw everything in the pot, right?
Understanding Decarboxylation
Raw cannabis has compounds called cannabinoids, like THCA, which aren’t really psychoactive on their own. To turn them into the THC that gives you that familiar feeling, you need to apply heat. This process is called decarboxylation, or ‘decarbing’ for short. Without decarbing, your edibles will be way less potent, if they work at all. It’s basically a chemical reaction where heat removes a carbon atom from the THCA molecule, making it THC. You can do this in your oven, and it’s pretty straightforward.
Toasting Your Marijuana
This is where the actual decarbing happens. You’ll want to preheat your oven to around 240°F (115°C). Spread your cannabis flower evenly on a baking sheet. Some people like to cover it with foil, maybe with a few small holes poked in it, to keep the flower from blowing around if you have a convection oven. Bake it for about 30-40 minutes. You’ll notice the smell gets pretty intense – that’s a good sign! After baking, let it cool down completely. It’s important to get this temperature and timing right; too hot and you can degrade the THC, making it less effective, and too cool means it won’t activate properly. A little browning is okay, but you don’t want it burnt.
| Temperature (°F) | Time (Minutes) |
|---|---|
| 240 | 30-40 |
| 300 | 17 |
Grinding The Decarboxylated Cannabis
Once your cannabis has cooled down after decarbing, it’s time to grind it. You don’t want to pulverize it into a fine powder, though. Aim for a medium grind, kind of like coarse sand or tea leaves. You can use a grinder, a mortar and pestle, or even just your fingers if you’re careful. The goal is to increase the surface area so the cannabinoids can infuse into the fat more easily during the next steps. Grinding too fine can make straining a real pain later on, and you might end up losing some of your precious butter.
Getting this preparation step right is key to making effective vegan weed butter. It might seem like an extra hassle, but it makes a huge difference in the final product. Don’t skip it!
After you’ve got your cannabis prepped, you’re ready to move on to choosing the right fat base for your vegan cannabutter. This is where we’ll explore different plant-based options that work just as well as dairy butter for making cannabis edibles.
Choosing Your Fat Base
Alright, so you’ve got your cannabis prepped and ready to go. Now comes the fun part: picking what you’re going to infuse it with. Since we’re going vegan, dairy butter is out, but don’t worry, there are some awesome alternatives that work just as well, if not better.
Coconut Oil As A Vegan Alternative
Coconut oil is a popular choice for vegan edibles, and for good reason. It’s readily available, has a pretty neutral flavor (especially refined coconut oil), and it’s packed with saturated fat. Why is saturated fat important, you ask? Well, THC, the main psychoactive compound in cannabis, binds best to fat molecules. The more saturated fat your base has, the more THC it can potentially hold onto during the infusion process. Some folks even say coconut oil yields a stronger result than traditional butter because of its high saturated fat content. It’s a solid go-to if you’re looking for a straightforward vegan option.
Selecting Plant-Based Butter
If you’re craving that classic buttery flavor and texture, plant-based butter sticks are your best bet. These are designed to mimic dairy butter, and many work really well for infusions. When you’re shopping, check the nutrition label. You’re looking for a product that’s close to traditional butter’s fat content, ideally around 11-12 grams of total fat per tablespoon, with a good chunk of that being saturated fat (around 7 grams). Unsalted is usually the way to go, just to keep things simple and avoid any weird flavor clashes.
Here’s a quick look at what to aim for:
| Nutrient | Target per Tbsp | Notes |
|---|---|---|
| Total Fat | ~11-12g | Similar to dairy butter |
| Saturated Fat | ~7g | Higher is generally better for THC binding |
| Sodium (Salt) | 0mg (Unsalted) | Avoids flavor interference |
Some brands might have “easy to spread” on the label, which means they have more water content. While great for toast, this might not be ideal for baking where you need the butter to hold its shape. Look for sticks that are firmer, more like traditional butter.
Understanding Fat Saturation For THC Binding
So, let’s get a little nerdy for a second. Think of fat molecules like little sponges for THC. Saturated fats have a really dense, straight molecular structure. This makes them super efficient at soaking up and holding onto cannabinoids like THC. Unsaturated fats, on the other hand, have kinked or bent molecular chains, making them less dense and, therefore, less effective at binding THC. This is why coconut oil and butter (which are high in saturated fats) are preferred over liquid oils like olive or canola oil for infusions. The more saturated fat your chosen base has, the more potent your final cannabutter is likely to be. It’s a simple concept, but it makes a big difference in the final product.
The Infusion Process
Alright, so you’ve got your cannabis all prepped and your vegan fat base ready to go. Now comes the fun part: actually getting all those good cannabinoids from the plant into your fat. This is where the magic happens, turning your ingredients into something special. There are a few ways to do this, and honestly, they all work, but some are just easier or give you a bit more control.
Slow Cooker Infusion Method
This is probably the most hands-off method. You basically set it and forget it, which is great if you’re busy or just want to minimize the chances of burning anything. You’ll need a slow cooker, a mason jar (or another oven-safe container), your decarboxylated cannabis, and your chosen vegan butter or oil. Put a towel in the bottom of the slow cooker to cushion the jar, add your ingredients to the jar, seal it up, and then fill the slow cooker with water until it covers the jar. Set it on low for at least four hours, or even longer if you have the time. Some people even let it go overnight on a ‘warm’ setting. The gentle, consistent heat is perfect for extracting everything without damaging the delicate compounds.
Stovetop Simmering Technique
If you don’t have a slow cooker or you’re in a bit of a hurry, the stovetop method is a good alternative. It’s similar to the slow cooker method, but you’re controlling the heat more directly. You’ll still use a water bath, but this time in a pot on your stove. Bring the water to a gentle simmer – you don’t want a rolling boil, as that can get too hot. Let it simmer for about 90 minutes to a few hours, keeping an eye on the water level and adding more hot water as needed. This method requires a bit more attention, but it can be quicker than the slow cooker.
Oven Baking For Infusion
This method involves baking your cannabis and fat mixture in the oven. You’ll want to use a baking dish or a Dutch oven with a tight-fitting lid. Preheat your oven to a low temperature, typically around 200-220°F (93-104°C). Place your ingredients in the dish, cover it tightly, and bake for a few hours. This method is great for getting a really thorough infusion, but make sure your lid is sealed well to keep the aroma contained. It’s a solid option if you’re already using your oven for something else.
Here’s a quick look at the general temperature and time guidelines:
| Method | Temperature Range | Time Range |
|---|---|---|
| Slow Cooker (Low) | 160-180°F (71-82°C) | 4-12+ hours |
| Stovetop Simmer | 180-190°F (82-88°C) | 90 mins – 3 hours |
| Oven Baking | 200-220°F (93-104°C) | 2-4 hours |
Remember, the goal is to heat the cannabis and fat enough to extract the cannabinoids without burning them. Lower and slower is generally better for preserving potency and flavor. This process is key to making potent edibles at home.
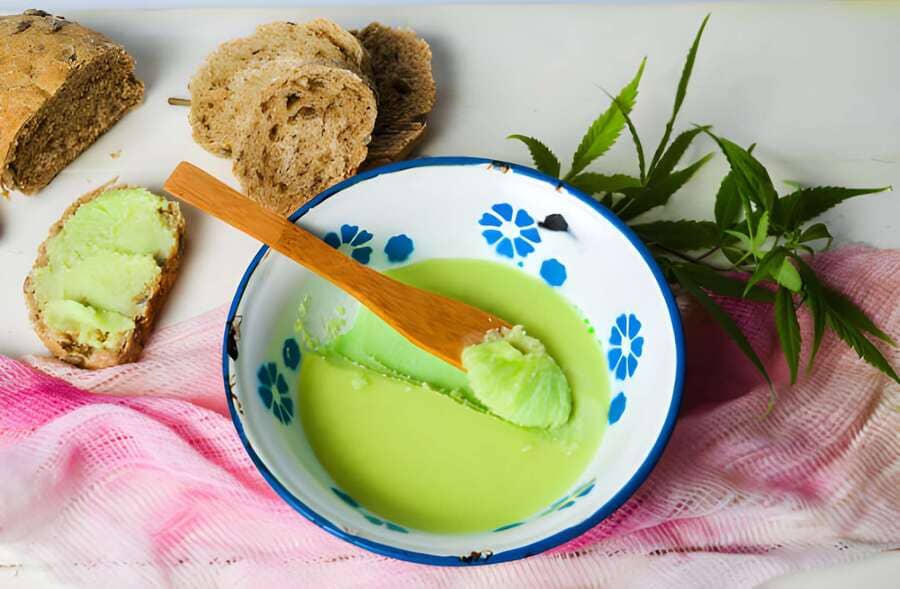
Straining Your Vegan Weed Butter
Alright, so you’ve gone through the whole infusion process, and now you’ve got this lovely, green-tinged oil or butter mixture. The next step is getting all that plant material out so you’re left with just the good stuff. This is where straining comes in, and it’s pretty important if you don’t want bits of weed in your edibles.
Using Cheesecloth For Straining
Cheesecloth is a classic for a reason. It’s a fine-mesh cotton fabric that’s perfect for separating liquids from solids. You’ll want to use a few layers of it, otherwise, you might end up with tiny bits of plant matter making their way through. To use it, drape a few layers over a bowl or a heatproof container. Then, carefully pour your infused butter mixture through the cheesecloth. Once most of the liquid has drained, you can gently gather the edges of the cheesecloth and give it a good squeeze to get out every last drop of that precious cannabutter. Be careful, though, as the mixture will still be hot! Discard the plant material left in the cloth.
Alternative Straining Tools
If you don’t have cheesecloth handy, no worries. A fine-mesh sieve or strainer works pretty well too. You might want to line it with a coffee filter if you’re aiming for super-smooth butter, though this can slow things down a bit. Some people even use a nut milk bag, which is basically a reusable, fine-mesh bag that’s great for straining all sorts of things. Whatever you choose, the goal is to get a clean liquid.
Maximizing Your Yield
To make sure you’re not wasting any of your hard work, give that plant material a good squeeze after straining. Seriously, get all the liquid you can out of it. You can use a spatula or even just your hands (once it’s cooled enough, of course) to press out the remaining butter. Every little bit counts when you’re making edibles, and you want to get the most potency possible from your cannabis. Remember, the quality of your starting material and the infusion process itself play a big role in how strong your final product will be, but proper straining helps capture it all. If you’re curious about different cannabis products, you might check out what The Hemp Company has to offer.
Storing Your Homemade Edibles
Alright, so you’ve gone through the whole process – decarbing, infusing, and straining – and now you’ve got this lovely, potent vegan weed butter. Awesome! But what do you do with it now? How do you keep it from going bad or losing its kick? Let’s talk storage.
Refrigeration and Room Temperature Storage
For short-term storage, keeping your cannabutter in the fridge is usually the way to go. Pop it into an airtight container – a glass jar with a tight-fitting lid works great. This helps prevent it from picking up any weird smells from other food in your fridge. If you’re planning on using it within a week or two, the fridge is perfectly fine. It’ll solidify nicely in there, making it easy to scoop out when you need it. You can also store it at cool room temperature, especially if you used coconut oil, as it tends to stay a bit softer than dairy butter. Just make sure the room isn’t too warm, or it might get a little melty.
Shelf Life of Vegan Cannabutter
So, how long does this stuff actually last? It really depends on the fat base you used and how you store it. Generally speaking, if you’ve used coconut oil, you’re looking at a longer shelf life compared to traditional butter. Properly stored in an airtight container, your vegan cannabutter can last for several weeks at room temperature (if cool) or a couple of months in the refrigerator. The key is to keep it away from heat and light, which can degrade the cannabinoids. If you notice any off smells or mold, it’s definitely time to toss it.
Freezer Storage Options
Got a big batch and don’t think you’ll use it all anytime soon? The freezer is your best friend. Freezing is an excellent way to preserve your cannabutter for much longer periods. Again, use an airtight container. You can even freeze it in smaller portions, like ice cube trays, so you can just pop out what you need without thawing the whole batch. Stored properly in the freezer, your vegan weed butter can stay good for six months, sometimes even longer. Just remember to label your containers with the date so you know how old it is. When you’re ready to use it, just thaw it out in the refrigerator overnight.
Understanding Potency And Consumption
Factors Affecting Cannabutter Strength
The strength of your vegan cannabutter isn’t just a random number; it’s a result of several things you did (or didn’t do) during the making process. The type of cannabis you start with is a big one. Different strains have different amounts of THC and CBD. So, if you pick a strain with, say, 15% THC, you’re going to get less potency per gram than if you used a 20% THC strain. It’s pretty straightforward math, really.
Then there’s how well you decarboxylated your cannabis. If you didn’t heat it enough, not all the THC-A turned into the THC that actually gets you high. Too much heat, and you might lose some of the good stuff. The infusion process itself matters too. How long did you let the cannabis steep in the fat? Was the temperature just right? All these play a part.
Here’s a quick look at what influences how strong your butter will be:
- Cannabis Strain: Higher THC/CBD strains mean stronger butter.
- Decarboxylation: Proper heating is key to activating cannabinoids.
- Infusion Time & Temp: Longer, controlled simmering usually extracts more.
- Fat Type: Some fats might bind cannabinoids slightly differently.
Mindful Consumption Practices
Okay, so you’ve got your potent vegan cannabutter. Now what? The most important thing is to be smart about how you use it. Edibles hit differently than smoking or vaping. They take longer to kick in – sometimes 30 minutes, sometimes up to two hours. So, resist the urge to take more if you don’t feel anything right away. Patience is your best friend here.
Start small. Seriously, especially if you’re new to edibles or using a new batch of butter. You can always have more later, but you can’t un-eat what you’ve already consumed. Pay attention to how your body feels. Are you relaxed? Giggly? Too much? Knowing your limits is part of the fun, not the struggle.
- Start Low and Go Slow: Always begin with a small dose.
- Wait It Out: Give edibles at least two hours before considering more.
- Know Your Dose: Understand how much butter you’re using and its estimated potency.
- Stay Hydrated: Drink water, especially if you feel dry mouth.
- Set and Setting: Be in a comfortable, safe environment.
Edibles are a marathon, not a sprint. The experience builds over time, so give your body the chance to process and enjoy the journey without rushing it. It’s all about finding that sweet spot where you feel good, not overwhelmed.
Lecithin’s Role In Edibles
Ever heard of lecithin? It’s a common ingredient, often found in soy or sunflower forms, and it can be a real game-changer for your edibles. Think of it as an emulsifier. In simpler terms, it helps fats and liquids mix together better. When you’re making cannabutter, the THC (which is fat-soluble) needs to bind well with your vegan fat base. Lecithin can help make that binding process more efficient.
Why does this matter for your homemade vegan weed butter? Well, a better bind can potentially lead to a more consistent and even distribution of cannabinoids throughout your butter. This means each bite of your edible might have a more predictable effect, rather than some bites being super strong and others barely noticeable. It’s not strictly necessary, but adding a bit of lecithin can help ensure you’re getting the most out of your infusion.
Wrapping It Up
So there you have it! Making your own vegan weed butter is totally doable, even if you’re not a kitchen wizard. We went through toasting the weed, grinding it up, and then letting it simmer away in your chosen plant-based fat. Remember to strain it all out with that cheesecloth at the end for a smooth finish. Now you’ve got this awesome ingredient ready to go into all sorts of tasty treats. Just be sure to start small when you try your creations, because these homemade edibles can pack a punch. Happy baking, and enjoy responsibly!
Frequently Asked Questions
What is decarboxylation and why is it important for making weed butter?
Decarboxylation is like waking up the THC in your cannabis. Raw cannabis has a form of THC that doesn’t get you high when you eat it. Heating it up, like in the oven, changes it into the kind of THC that does affect you. This step is super important because without it, your weed butter won’t have the kick you’re looking for.
Can I use any kind of oil or fat for vegan weed butter?
You can use different plant-based fats, but coconut oil is a popular choice because it’s good at holding onto the THC and doesn’t burn easily. Some vegan butters work too, but check if they have a lot of water in them, as that can make the process trickier. The key is to use a fat that’s stable when heated.
How long should I cook the weed butter for?
The cooking time can vary depending on how you make it. Using a slow cooker might take several hours, like 4 to 8 hours, or even overnight on a warm setting. If you’re simmering it on the stove or baking it in the oven, it can range from 2 to 6 hours. The goal is to let the cannabis and fat hang out together long enough for the THC to move into the fat.
What’s the best way to strain the weed butter?
Using cheesecloth is a common and effective method. You line a strainer with a few layers of cheesecloth and pour your mixture through it into a container. Gently squeeze the cheesecloth to get all the liquid butter out. This helps remove the plant bits for a smoother final product.
How do I know how strong my weed butter is?
The strength depends on a few things: how much cannabis you used, how strong that cannabis was (its THC percentage), and how well the THC transferred into the butter. It’s always best to start with a small amount of your homemade butter in whatever you’re eating, wait at least an hour or two, and see how it affects you before having more. This is called mindful consumption.
How long does vegan weed butter last, and how should I store it?
When stored properly in an airtight container, your vegan weed butter can last for several weeks in the refrigerator. If you want to keep it for longer, you can store it in the freezer for several months. It will become solid when cold, so just let it warm up a bit before using it.